
I hope my jottings help others to keep their enthusiasm going for Hornby Dublo 3 rail layouts.
Post 1
.I was very disheartened at the prospect of losing my original HD layout as we embarked in relocating to Scotland. I attach a pic to give some idea of my layout.

The prospect of starting from scratch has been a bit daunting but after moping around for a few months I’ve finally started to build the new layout. This time round I’ve tried to use my experience to make improvements on my original efforts. First off has been to use SCARM software to help me plan my new layout and give me an early idea of the general design. Here is my basic design.

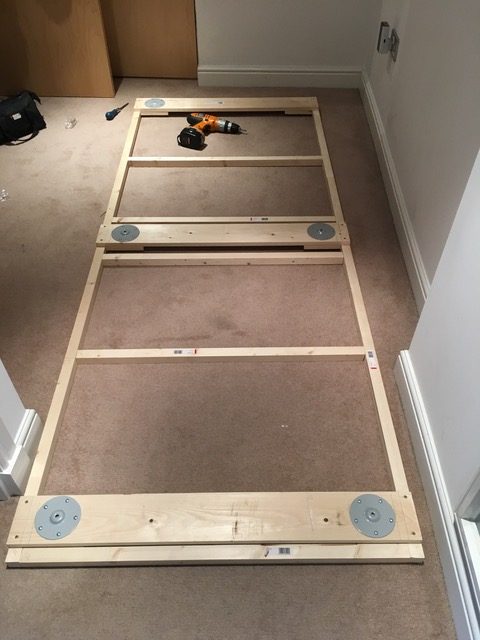
Building a new baseboard has been fun and this time around I’ve tried to make sure that it’s (a) possible to dismantle it by building it in sections (b) that it can be accurately levelled using adjutable feet and (c) that it is strong and robust by using support battons every one foot length of baseboard (total length 8.5 feet)
Here’s a picture of the framework and

![]() the first track laydown.
the first track laydown.

Work still in progress
Post No 2
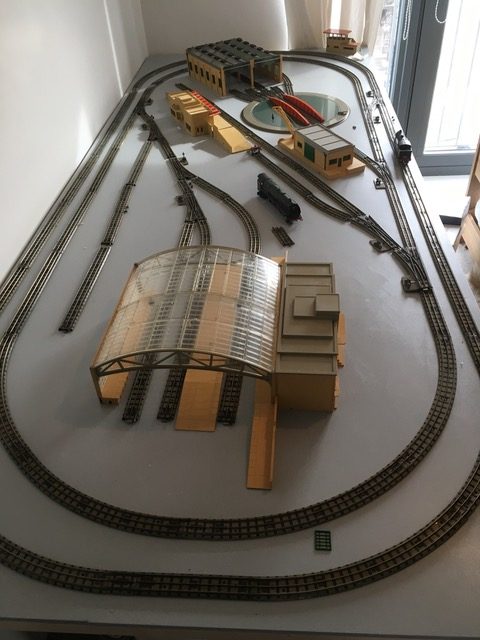
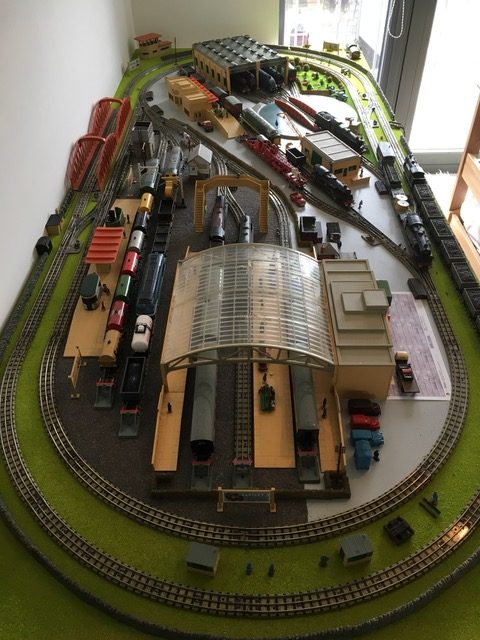
Well, my initial enthusiasm for building my new layout continues but I’d forgotten a couple of key issues since I built my first layout. Probably most important is the sensible display of HD buildings. They need to be spread out across the layout and in a way that maximises their display value. So, I want the turntable with its shed (and extension) to invite the eye to look at the parked locos within. I’ve attached a picture from my old layout which, hopefully, shows the look I’m after.

I also decided to make the pretty large 5083 building to be a through station rather than a terminus. I’ve still to add signal boxes, good shed etc. I also wanted some good long sidings to display my favourite rolling stock.
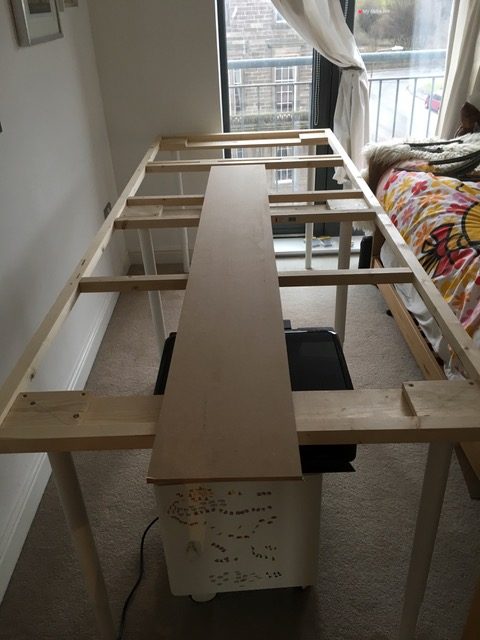
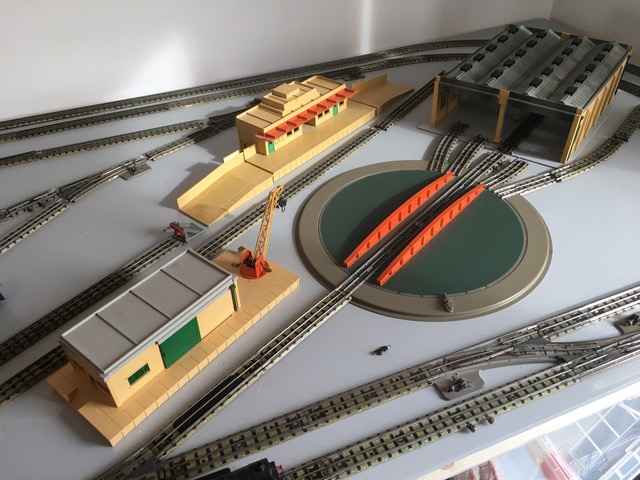
So, my initial SCARM plan has changed considerably and a very basic re-worked layout seems to be approaching what I think will be close to a final configuration. I’ve attached one picture to show the basic arrangement so far.

A bit of my re-design is to do with practical reasons. For example, it doesn’t make sense to lean over three sidings when using the turntable – so they need to be more distant.
On a more quirky note – the table legs for my new layout were cut to the same size as my original layout. However, in a longer but narrower attic space they just looked too high. Sounds odd but I ended up cutting two inches off their length and now they look in proportion.
Post No 3.
Well, I thought things were going well with my layout design finally settled and I’d begun to get all enthusiastic. However, an unexpected challenge has arisen. In a nutshell it seems that in a very hard frost – some little mositure droplets can form around the nails that hold our roof tils on. This moisture can then run along the nail shaft and onto the layout. It’s a bit odd as the roof is watertight in the worst possible storms.So, I need to move the layout and sheet up the roof space above the layout. What a pain. But, thank goodness I learnt from experience and built the baseboard in modules. (baseboards.jpg)By the way I attach a painful picture of what happens to a biggish layout if you can’t get it out of your attic !
 (layout sawing.jpg)Work still in progress !
Post No 4
In my previous post I was worried about a leaky roof dropping moisture onto my layout. Well, it’s not what I thought. The following explanation from my brother means a much easier fix.
I don’t think the moisture travels along the nails. I think the moisture in the air, greater than usual concentrations if you’ve been up there for an hour or two, is attracted to the cold nails which have conducted the cold from outside to inside and condenses on the metal. The sharp tip provides a good collecting point – a droplet forms and then drips when the weight overcomes the surface tension.
So, I only need to cover the nail tips rather than seal leaks. Useful perhaps info if you’re running an attic layout.
Post 5
I have finally covered the roof space between roof timbers and, hopefully, this will prevent moisture droplets from landing on my layout. So far it seems to be working. I have for a long time been a fan of Hornby Acho but knew, of course that it’s not a 3 rail system. I’ve had a bit of a lightbulb moment in wondering how to incorporate some Acho rolling stock on my new layout.

The answer is a very pleasing three rail conversion of a Lima SCNF train. I include two pics – one of the train and the conversion skid. It runs very strongly on 3 rail track.

(Editor’s Note – The first AcHo pictures on the website. Don’t forget that this is HO not OO)
Post 6
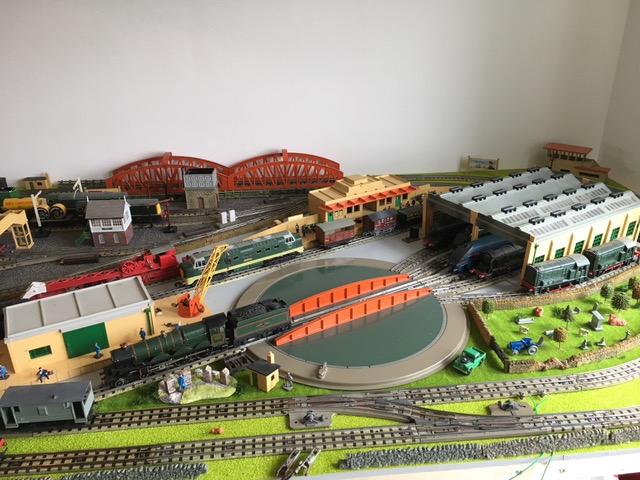
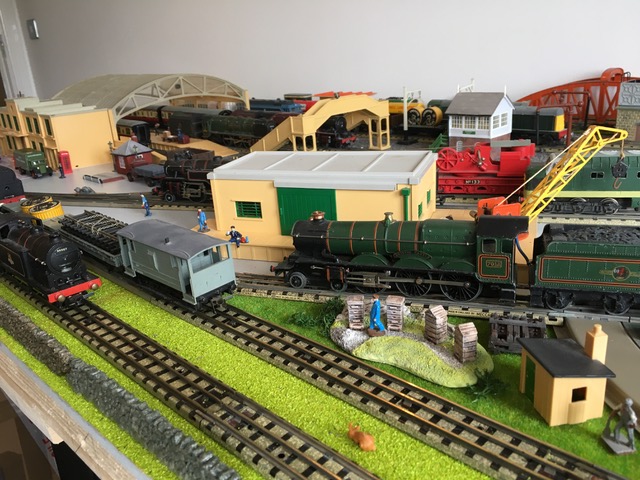
I’ve been making some progress recently. I’ve now firmly settled on my layout design and have placed all significant buildings, electric points and sidings. I’m attaching a couple of pics to give an overall idea of the layout. Apologies for the lighting but that has still to be addressed.


Lots of initial snagging work has been done. I’ve identified poor track, shorts (using continuity testing) and generally tested some of my more reluctant trains over key points. I’d forgotton just how much effort it takes to get a decent layout running. I’m still unpacking my locos and rolling stock and getting the odd surprise – e.g. why do I have four Nigel Gresleys ?
But there is a lot of pleasure now that I’ve got trains reliably running in my double loop track. I haven’t got near any scenery yet. Work in progress. Most useful bit of track = the 1/8th straight. I’ve used it repeatedly to allow me to just sneak in an extra siding here and there; also, to push the engine shed just a fraction further back.
It was my father who introduced me to the joys of Hornby Dublo all those years ago and I was delighted when my brother opened an old box and there was my father’s old Triang Hornby loco – minus a fair bit of valve gear. But, within a week I got the missing pieces from Ebay and it’s now complete. I attach a pic. So, I’m reunited with that very important train. It will find a place on my new layout.

__________________________________________________________________________________
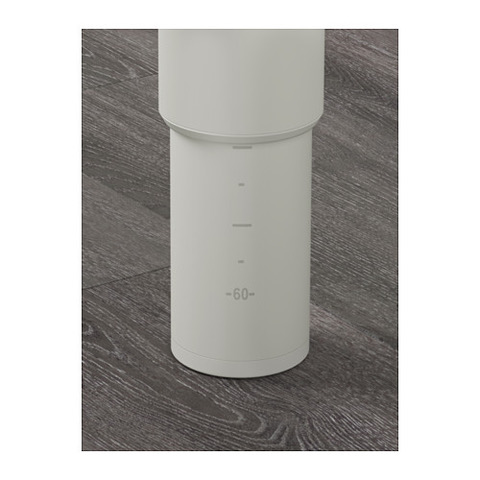
A bit of a gap but I’ve had to re-locate and have finally started to build – from scratch – a new layout. I’ve attached a couple of pics. Still building the layout table but have found IKEA adjustable table legs very handy indeed.
Here’s a couple of pics as I try to finalise the new layout. Work in progress. At the moment I just wanted to get the main buildings and track features roughly positioned so I can see if it looks balanced enough. The baseboard is 9mm MDF and sealed. Top tip is – if you know that your baseboard sections will be a certain length (e.g. 6 feet) – place a supporting baton at that same length.
I’ve been making steady progress with the new layout and here’s some pics. I’ve been running my Hornby Acho diesel which is converted to 3 rail running – goes very well on properly cleaned track.
Like the look of your layout.Just starting myself with some of my boyhood Hornby Dublo. What size is the layout? Look forward to see your progress on this.
My layout is 8 foot 6 inches long by 43 inches wide. This size allows for a double loop configuration (half-rail straight between curves) with sufficient length (6 straights) to provide enough sidings to take a turntable and runs to a couple of stations. It has electric points throughout. The baseboard is made of two sections with the wiring put through what are called pluggable terminal blocks. In short all the wiring can simply be unplugged by pulling the two sections apart – then simply replugged !
Just about the size I can cope with.Thanks for the info, look forward to seeing more photos.
Like Brian I am just restarting my HD hobby – really grateful for the pointers on the layout – mine is going in the loft as well. A question please on your layout – which I would add looks excellent. With the 2 loops of track can you run with 2 controllers 2 locos at the same time using an isolating tab or insultion rail and switch between at the points cross over? How do you hand over from one to the other if switching tracks? Also if you can – how do you deal with a diamond crossing that cuts across the inner loop for isolation? I have 2 Gaugemaster series 100 units that I would be using.
Kind regards
Bob
Yes, I can run both loops independently because they are joined by opposing isolating points. These are manually operated. Switching stock and locos between the loops is done using these points. I always make sure I have a couple of long isolated sidings that can take the inner loop train and stock before bringing an outer loop loco across to the inner loop. Any decent dual controller should work with separate terminal rails for inner and outer loops. I don’t use the diamond crossing rail – just a bit too complex and some locos don’t run well on them.
Thanks Alistair – much appreciated. Bob
Looking at your layout makes me very tempted to dig out all my old HD again.
Please can you tell me what the surface of your base-board is?
It’s been a while since I was at this site (my initial interest was the Canadian Pacific page) and I’m so glad that I’ve returned. A couple of years ago I decided not to sell the HD that I had packed and repacked for fifty years! Instead with the help of the internet I began accumulating more HD – much of which I didn’t know existed. Given the way I’ve been collecting I’m actually not surprised that you have four Nigel Gresleys! Now I’m into the next stage – building the layout, also in my attic so my collection can finally come out of the cupboards. My table (baseboard) is roughly 5′ x 10′ so I am most interested in your (Alistair’s) layout which will fit nicely on my table and leave me some room to make changes and additions. I’ve used quarter inch cork sheet to cover the table (from homedepot.ca where a roll 4’x25′ cost less that $100). I’m located on Vancouver Island which is pretty much a desert as far as HD is concerned so I’m sure I’ll be back here more often. Any readers who are hesitating about a layout should at least take the time to unpack and take a look at their HD collection!
there are a few of us HD collectors around in “the colonies”…first HD equipment was in Chemainus at 7 years old..now have my main HD layout and collection on Pender Island in the Gulf islands..let me know if I can be any kind of resource..p.s. thank heavens for Ronald Dodds’ videos on fixing things, and of course inspirational sites like this one
Hi Floks.
I’m wanting to build a traveling HD 3 rail layout and would like to base it on one of the orignal layouts. The size I have in mind is 8×4 plus side for controls,and want to add the turntable.
Any one have the track plans and if possible the orignal picture/Poster.
Would be much appreciated.
Henry Rogers
Ps I have a full 00 working around my garage.
Henry,
Layout books from Meccano are here http://gpoclocksystems.byethost22.com/dublo/?i=1 It is also in the links under Hornby Dublo Book of Trains
Fabulous info, thanks. I am currently reviving my HD stuff first acquired at age 7, 65 years ago. I love the layout. Aiming at 8 X 4 board over the large kitchen table.
Alistair
Do you have a wiring diagram for your loft layout
Kind regards
Jeffrey
Jeffrey, I haven’t had an update from Alistair for some time. I hope that he reads this
What are the best/correct screws for fixing track to the base board and where can I get some please?
Round-headed brass screws for preference, as countersunk screws are more likely to deform the tinplate track base.
Depending on the depth of your baseboard, No3 x 3/8ths or No3 x 1/2 inch. Some people use No2 as this allows a little track movement
Ron Dodds recommends these “Owfeel 200pcs 2x10mm Bronze Screw Self Tapping Screw Washer Head Screw Self-drilling Screw” but they don’t seem to be available on Amazon any more
John Harrison sells 200 SPAX screws as recommended by HRCA for fixing track into plywood for £7.50 plus p&p. Contact john9761 at hotmail dot co dot uk
One thing to watch is not to tighten the screws too much. They should just hold the track and no more. If you keep on tightening you will risk bending the track base downwards which will not help good running. I know because I have done it!!